Select Categories
AI Image Tools
March 3, 2026Section 1: Introduction
Section 2: Things to Note Before You Start
- AI product tools include both AI Image and AI SEO tools.
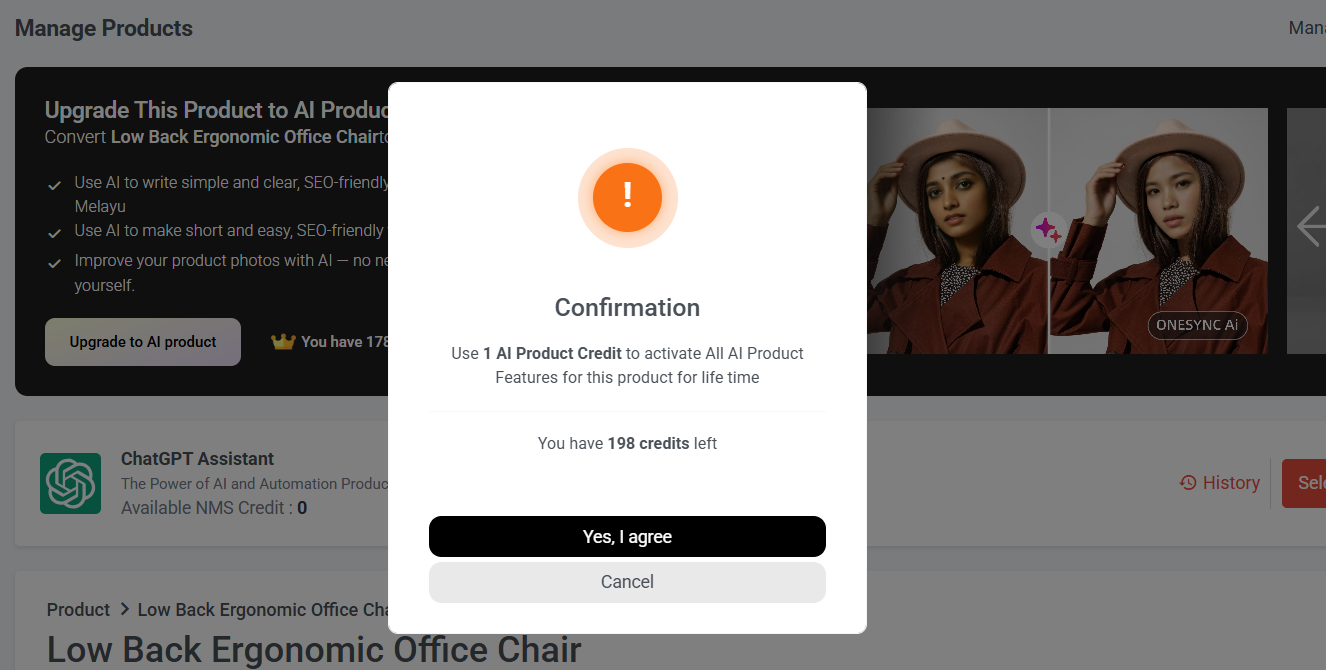
- Activate 1 AI product costs 1 credit. The number of credits you have depends on your package.
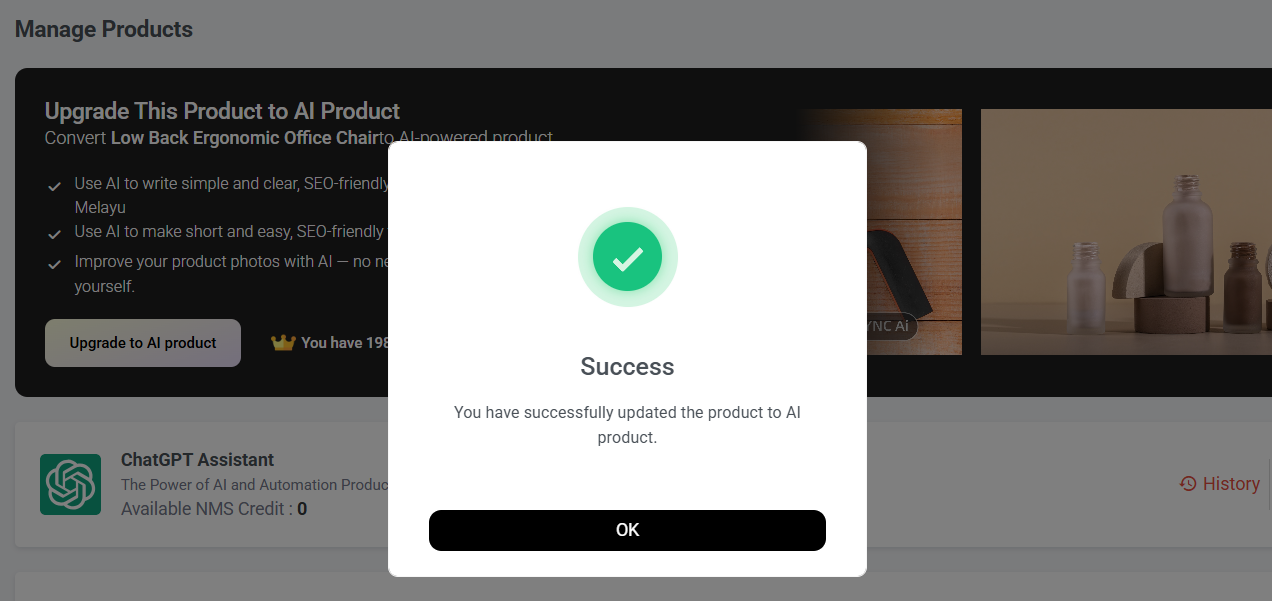
- Once activated, you can use all the AI product tools for life without any additional credit cost.
- Both main and sub image can use AI image tools
- If you delete the AI product, the credit used to activate it will not be returned.
How to identify products that unlock AI-powered features

Section 3: How to Access AI Image Tools
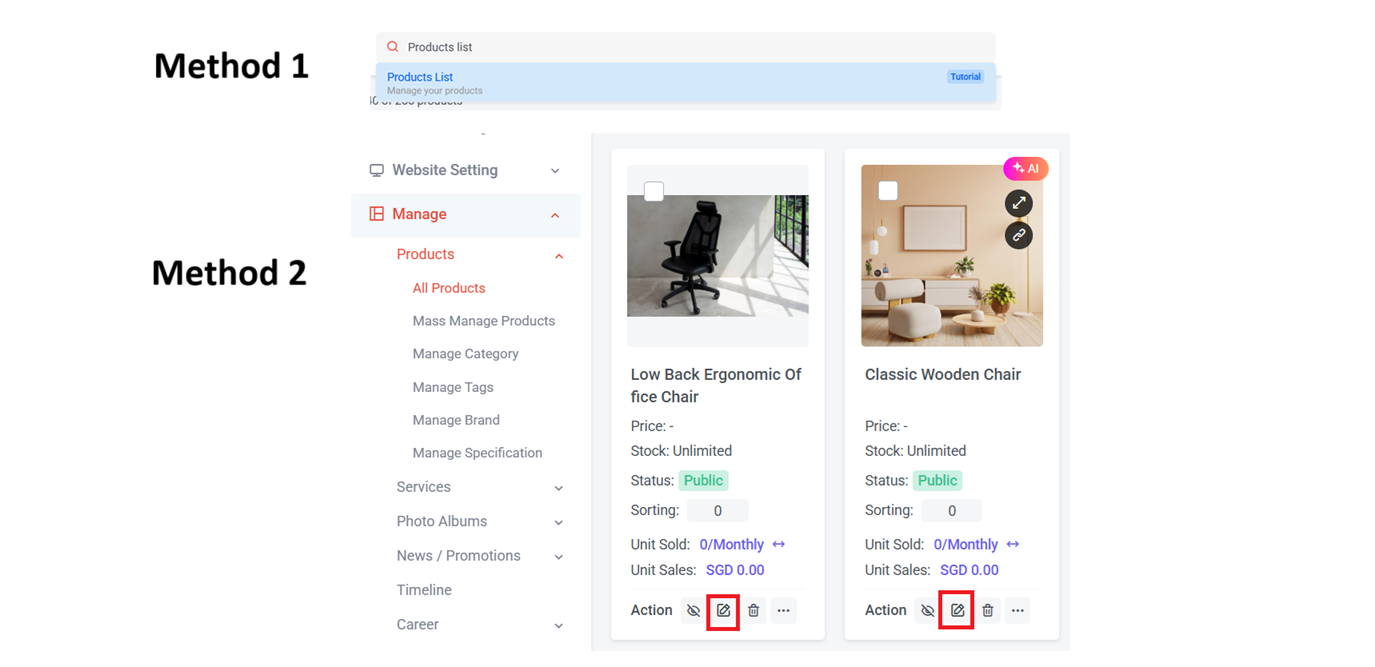
Step 2: Access the Product list page. Here are the ways to access it:
Method 1: Search "Product List" in the search menu bar at the top of NMS
Method 2: Go to NMS side menu > Manage > Products > All Products
Step 3: Select the Product that you wish to edit and click
Section 4: How to Activate AI Product Feature
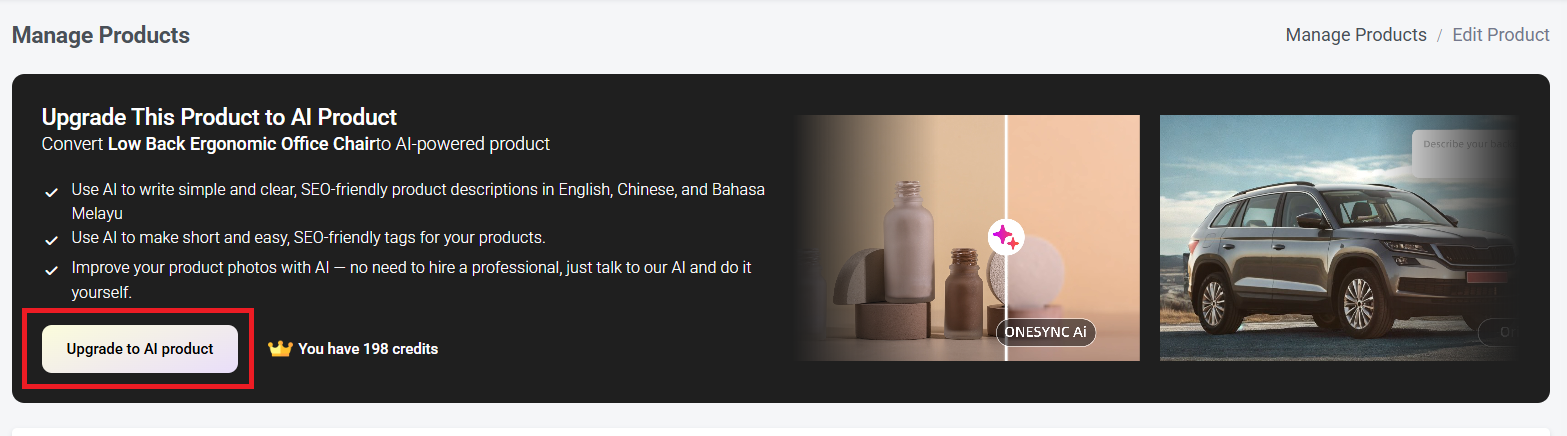
Step 2: Click the Upgrade to AI product button

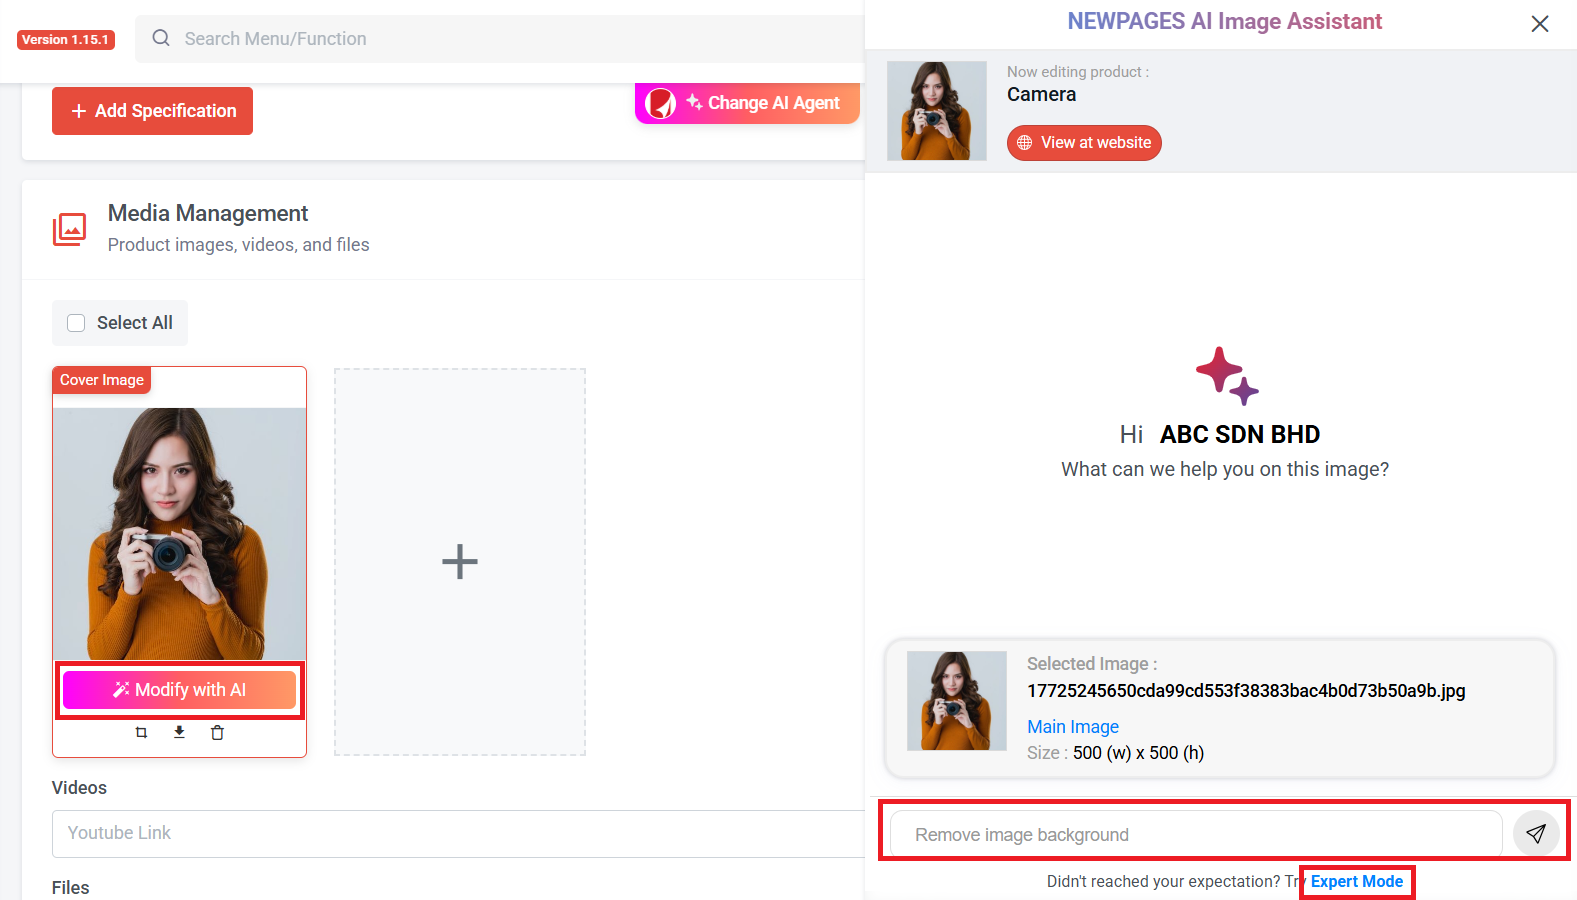
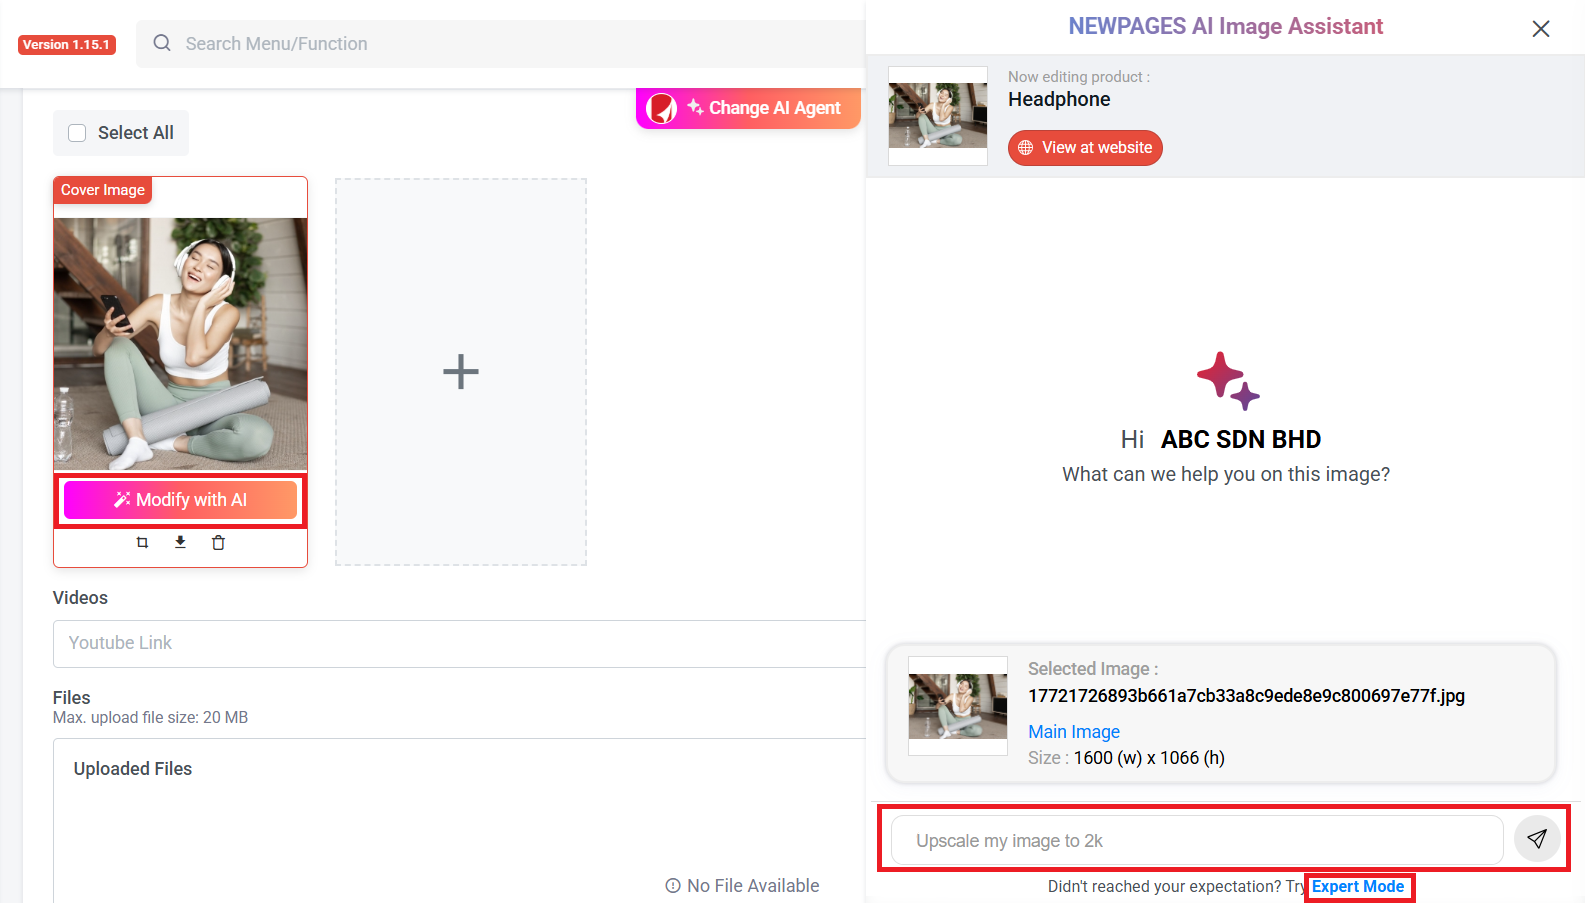
Section 5: AI Remove Background
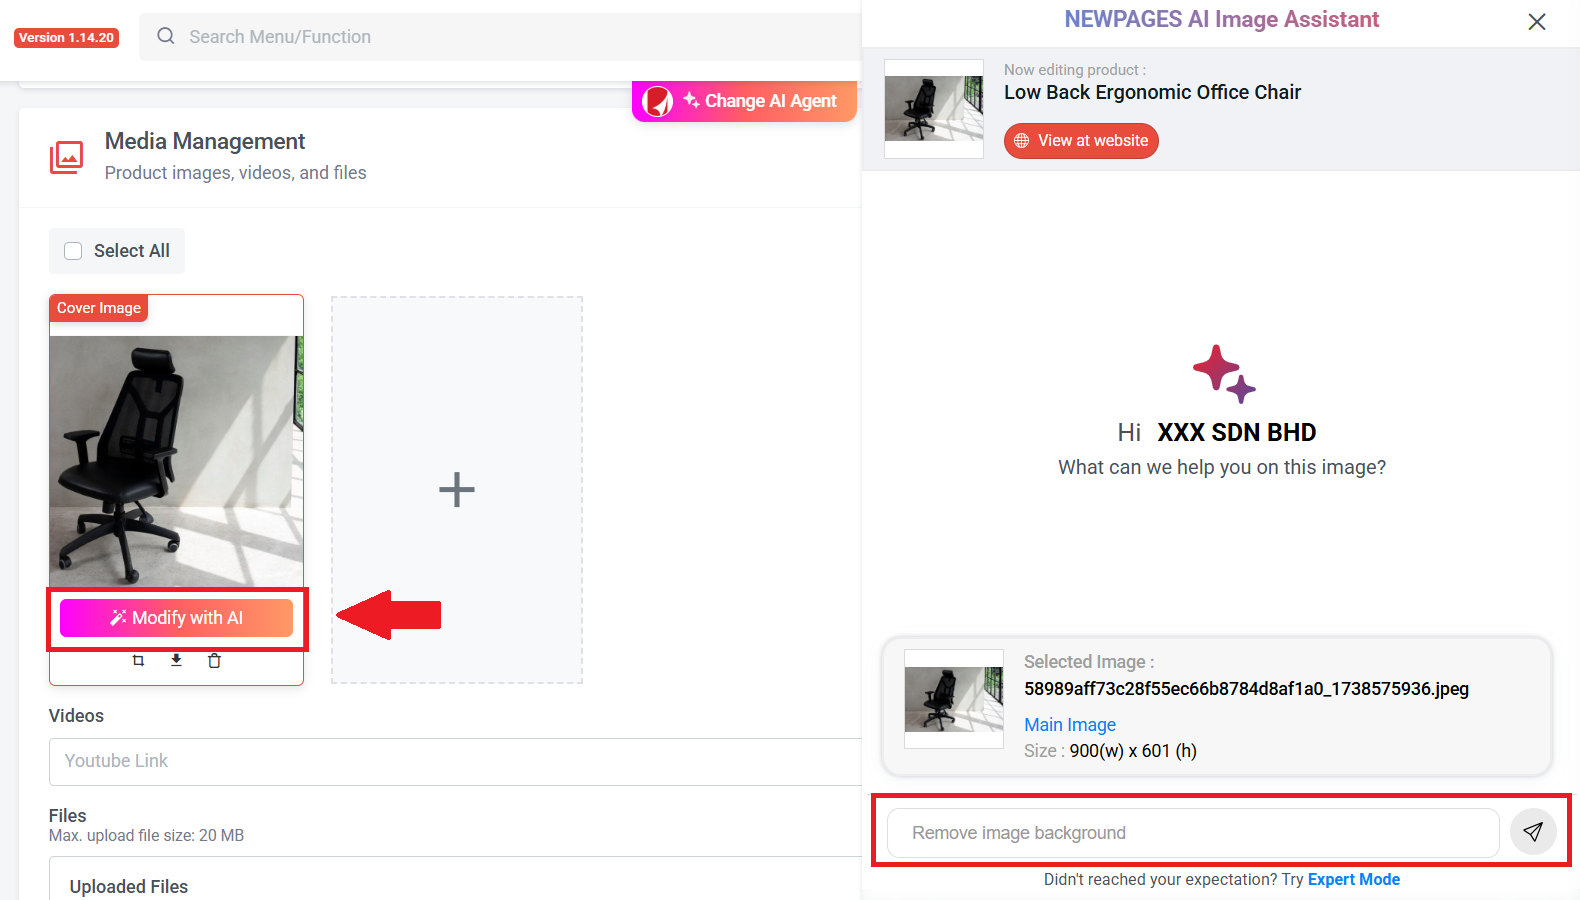
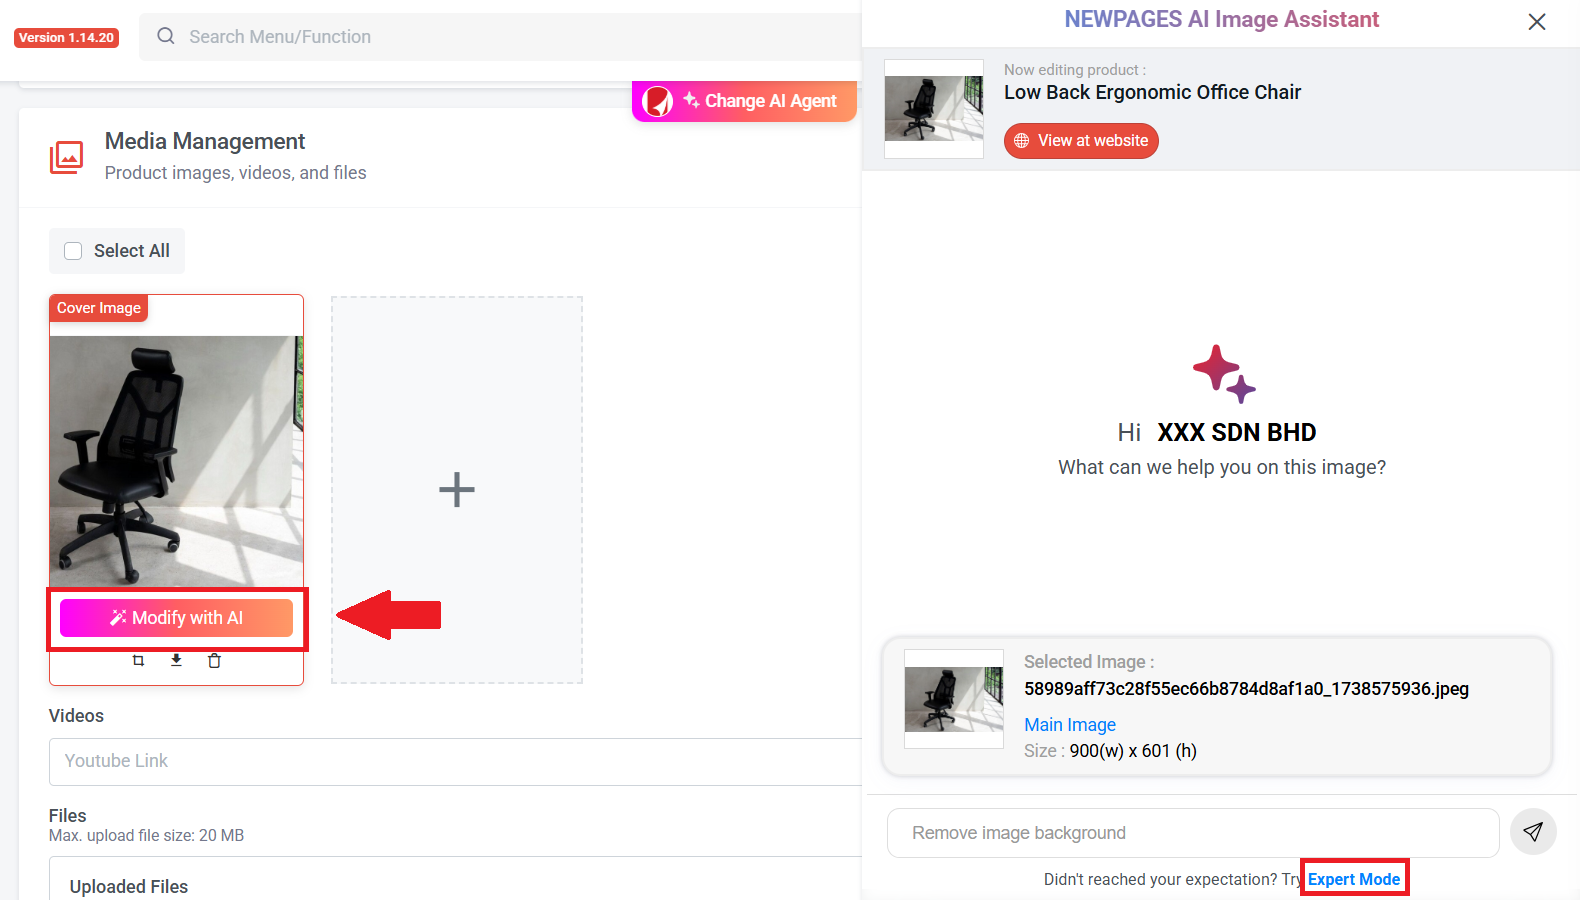
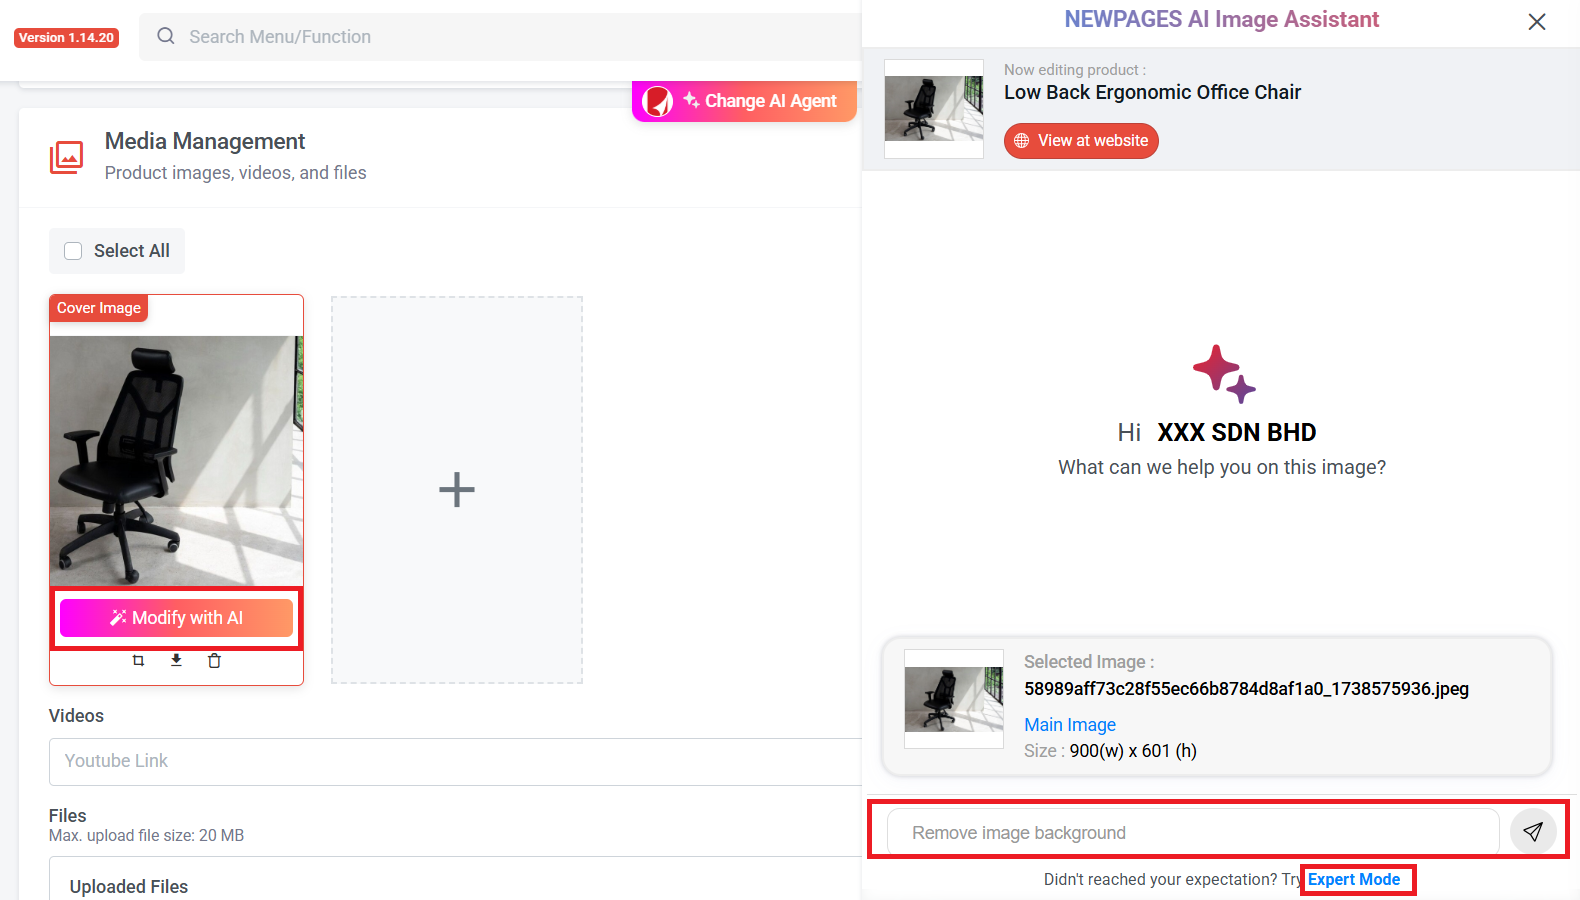
Step 2: You can enter your request in the field. Once done, click 'Send'."
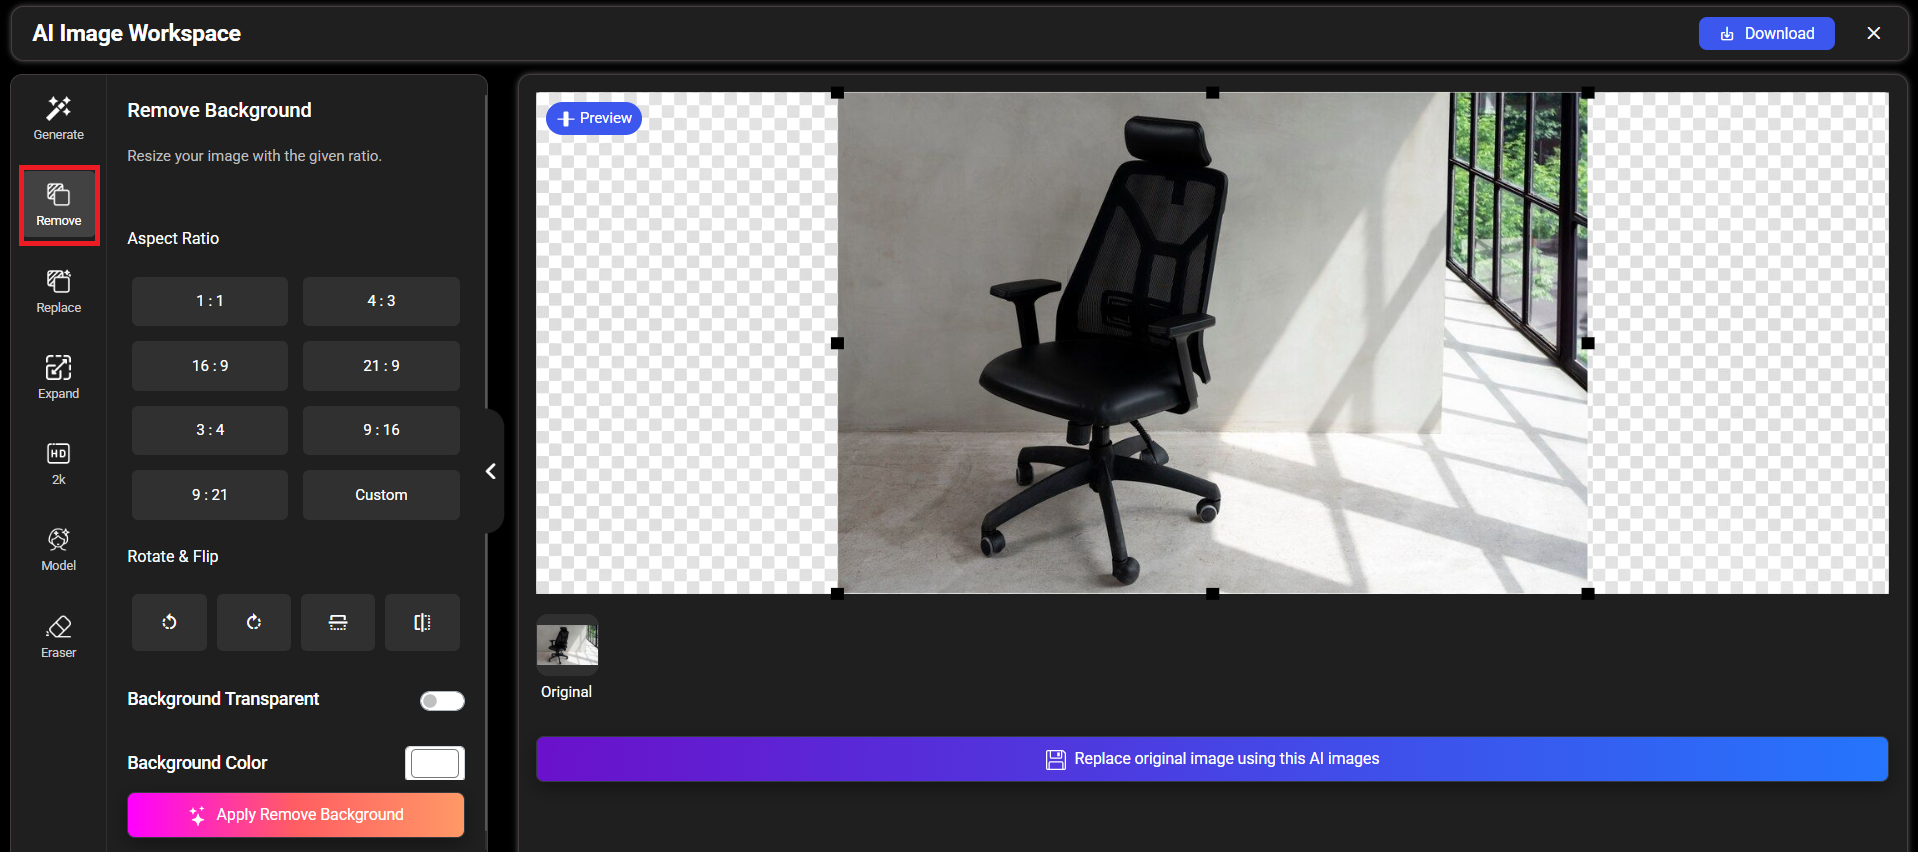
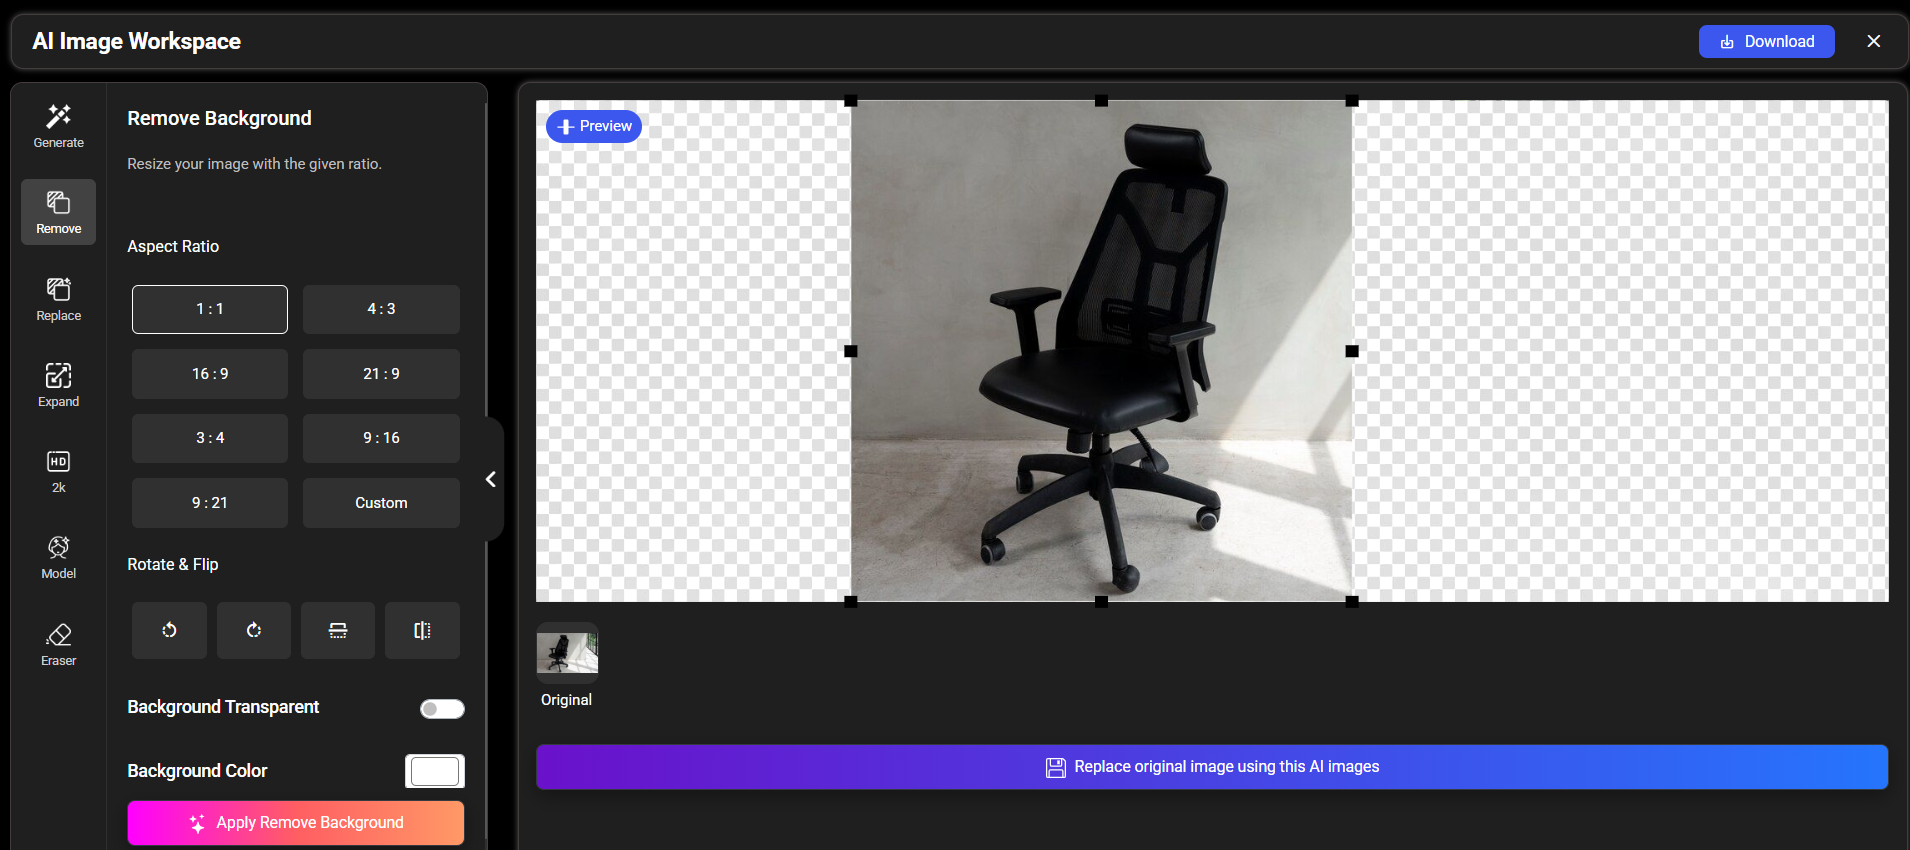
If you want a square image, choose the 1:1 aspect ratio. You can move your mouse cursor over the image and drag it left or right to your preferred position.

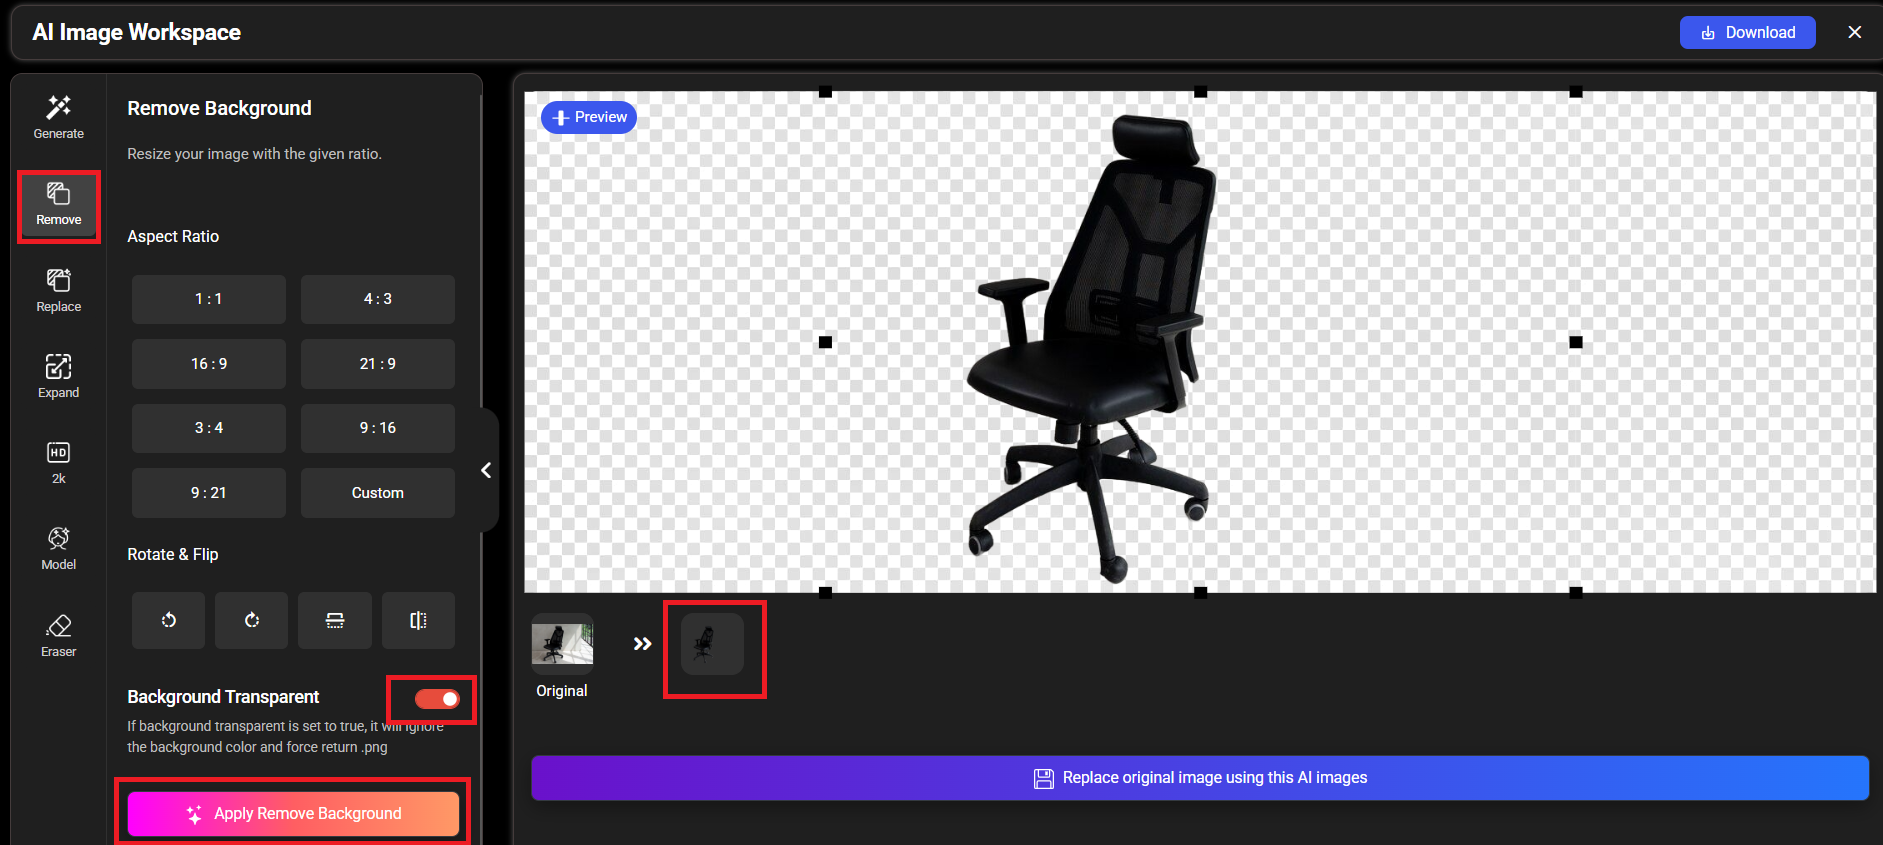
If you want a transparent background, turn on the "Background Transparent" button, click "Apply Remove Background"
Once finished, click the image next to the right arrow of the original image to view the resulting image.
You can click the "Preview" button to view the before and after results.
Above is the video showing the before and after editing.

If you want to change the background colour, click the colour option and choose your preferred colour. If you know the RGB colour, you can also enter the colour code for a specific colour.
Once you have chosen the colour, you can click "Apply Remove Background".
Once finished, click the image next to the right arrow of the original image to view the resulting image.

Section 6: AI Replace Background
Let's go over the steps to replace the image background.
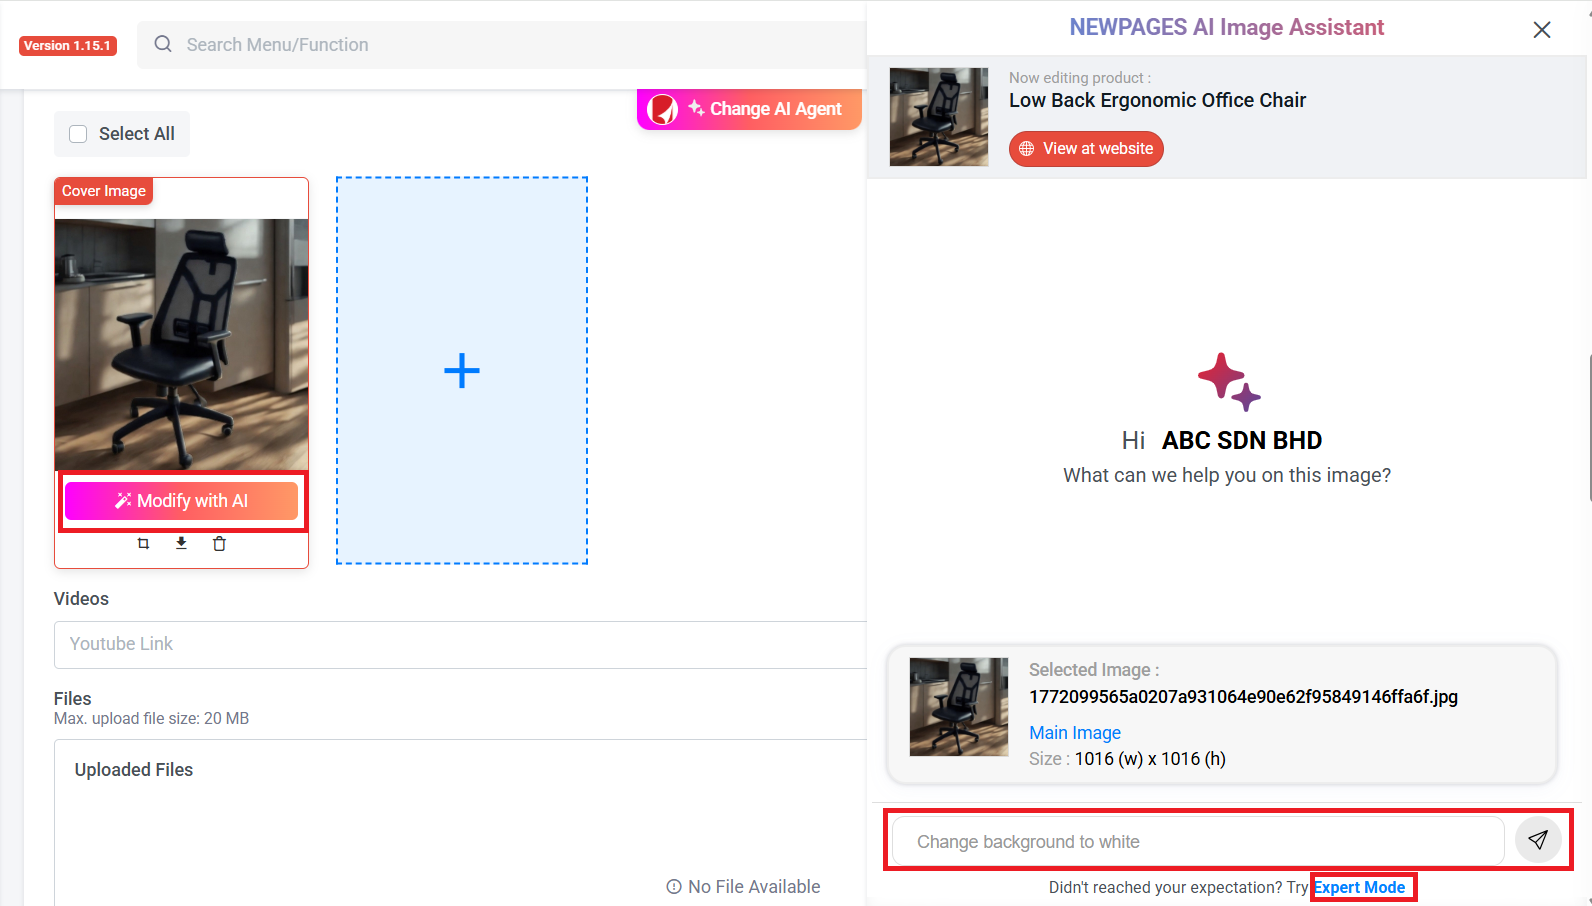
Step 2: You can enter your request in the field. Once done, click 'Send'."
If the results don’t meet your expectations, you can click 'Expert Mode' for advanced features.

Step 4: Type a description of the background you'd like, and try to use five or more words to give the AI a clearer idea of your vision.
Step 5: Turn on Square Fit to resize your picture into a square shape. If you want to keep your original picture, you can turn it off.
Step 6: Click "Apply Replace Background" to replace the background with AI background
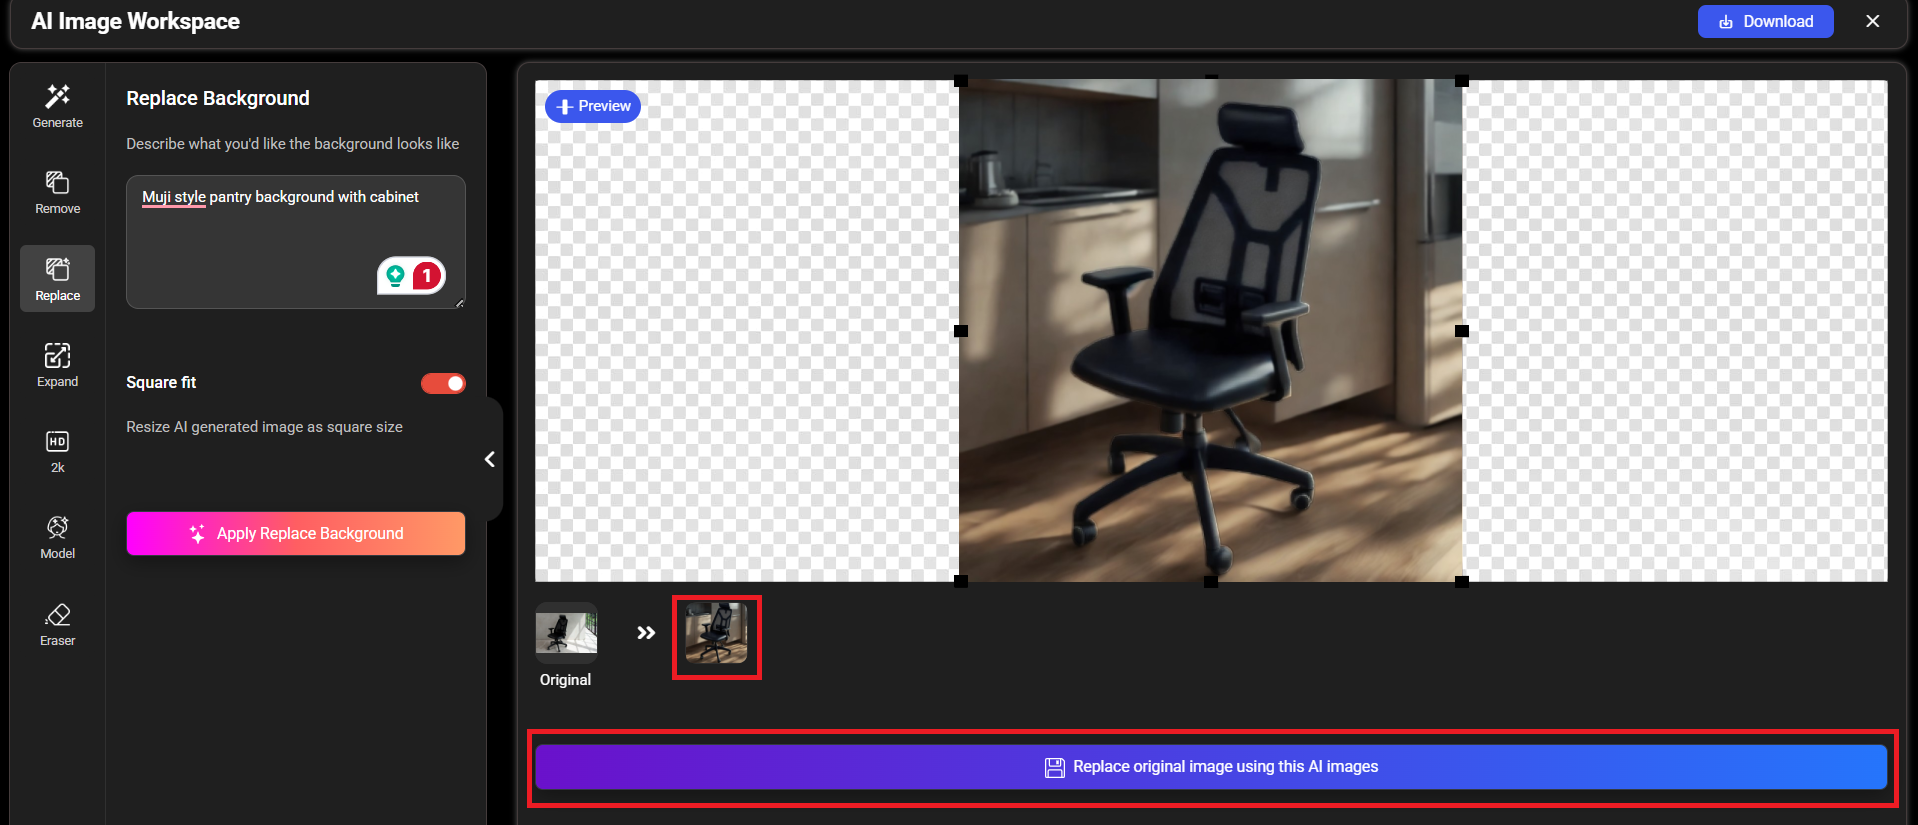
You can click the "Preview" button to view the before and after results.
If you're happy with the result, click 'Replace Original Image with AI Image' to automatically update the website picture.
You can also click 'Download Image' to save it.
Section 7: AI Extend Image (Outpainting)
Let's go over the steps to extend the image.
Step 2: You can enter your request in the field. Once done, click 'Send'."
If the results don’t meet your expectations, you can click 'Expert Mode' for advanced features.

Step 4: Enter the image size you want to set. The maximum size is 2000px. If set 0, it will be the image's original size.
Step 5: Drag the red dot left or right to adjust the extend ratio. Don't set it too high—it's recommended to keep it under 10%, or the product may appear too small.
Step 6: Turn on Square Fit to resize your picture into a square. If you want to keep the original shape of your picture, turn it off.
Step 7: Click "Apply Image Expand" button
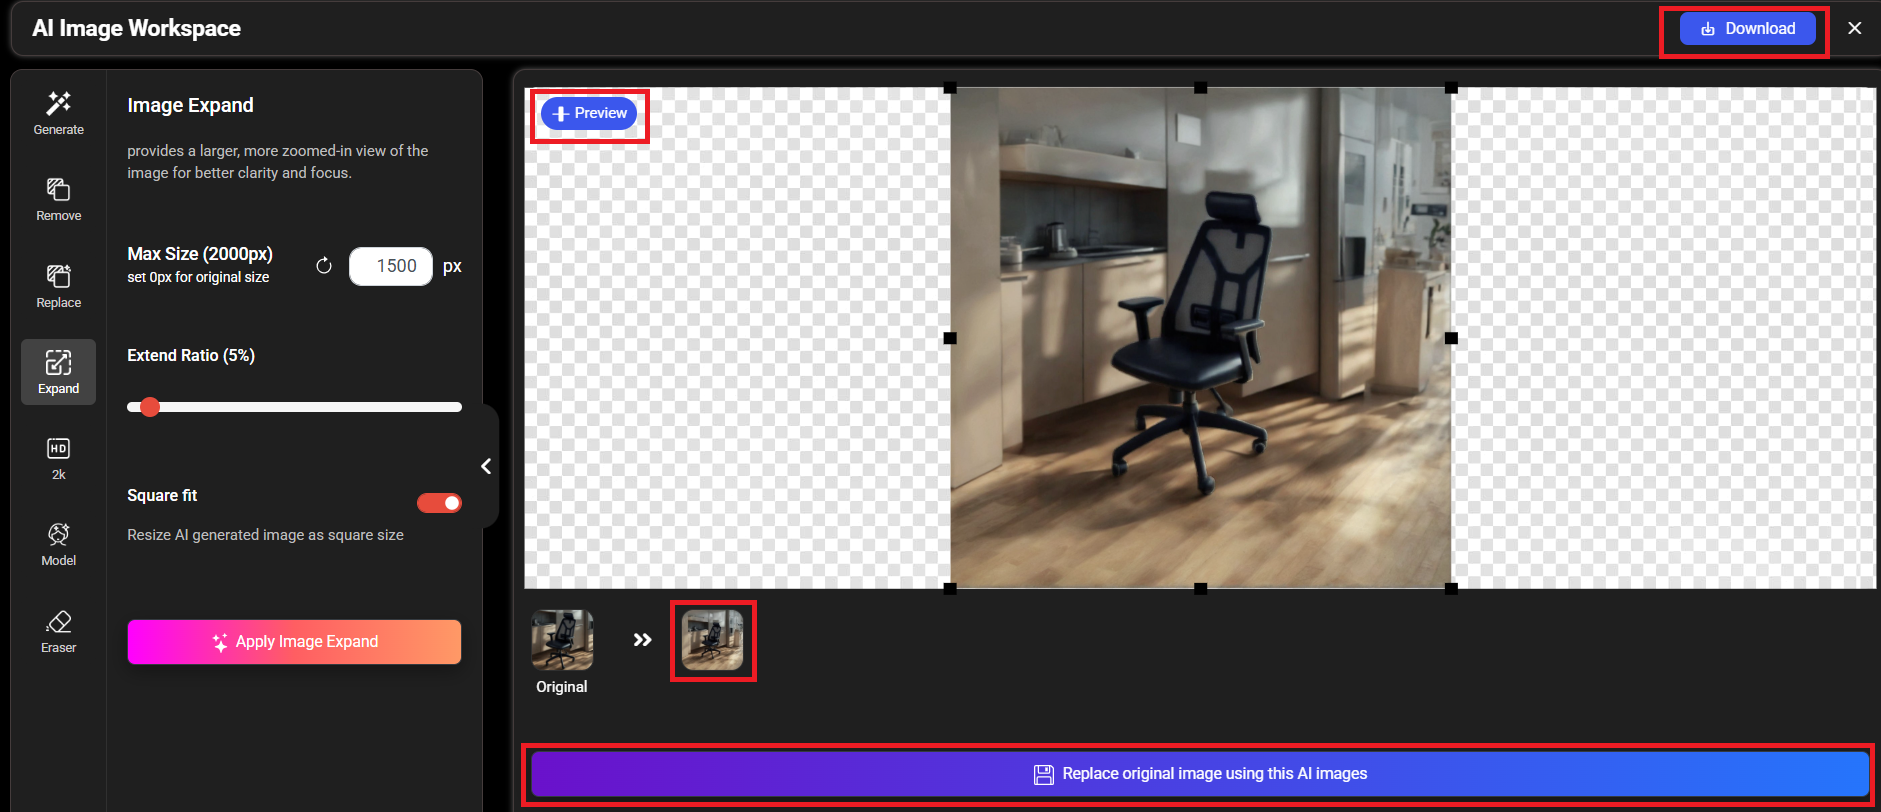
You can click the "Preview" button to view the before and after results.
If you're happy with the result, click 'Replace Original Image with AI Image' to automatically update the website picture.
You can also click 'Download Image' to save it.
Section 8: AI Image Upscale
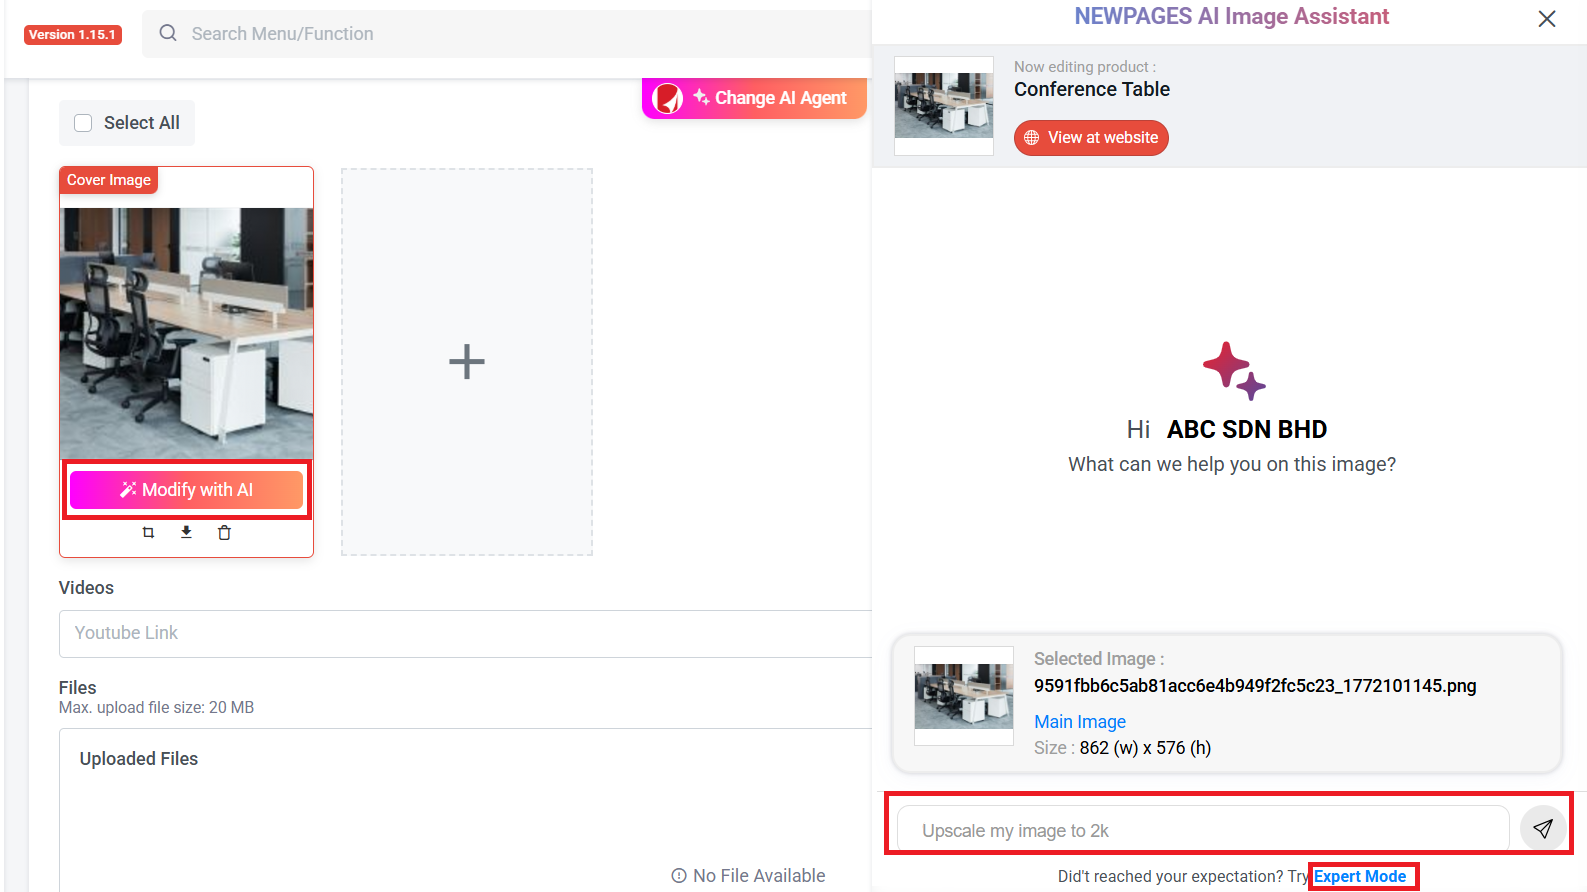
Step 2: You can enter your request in the field. Once done, click 'Send'."
If the results don’t meet your expectations, you can click 'Expert Mode' for advanced features.
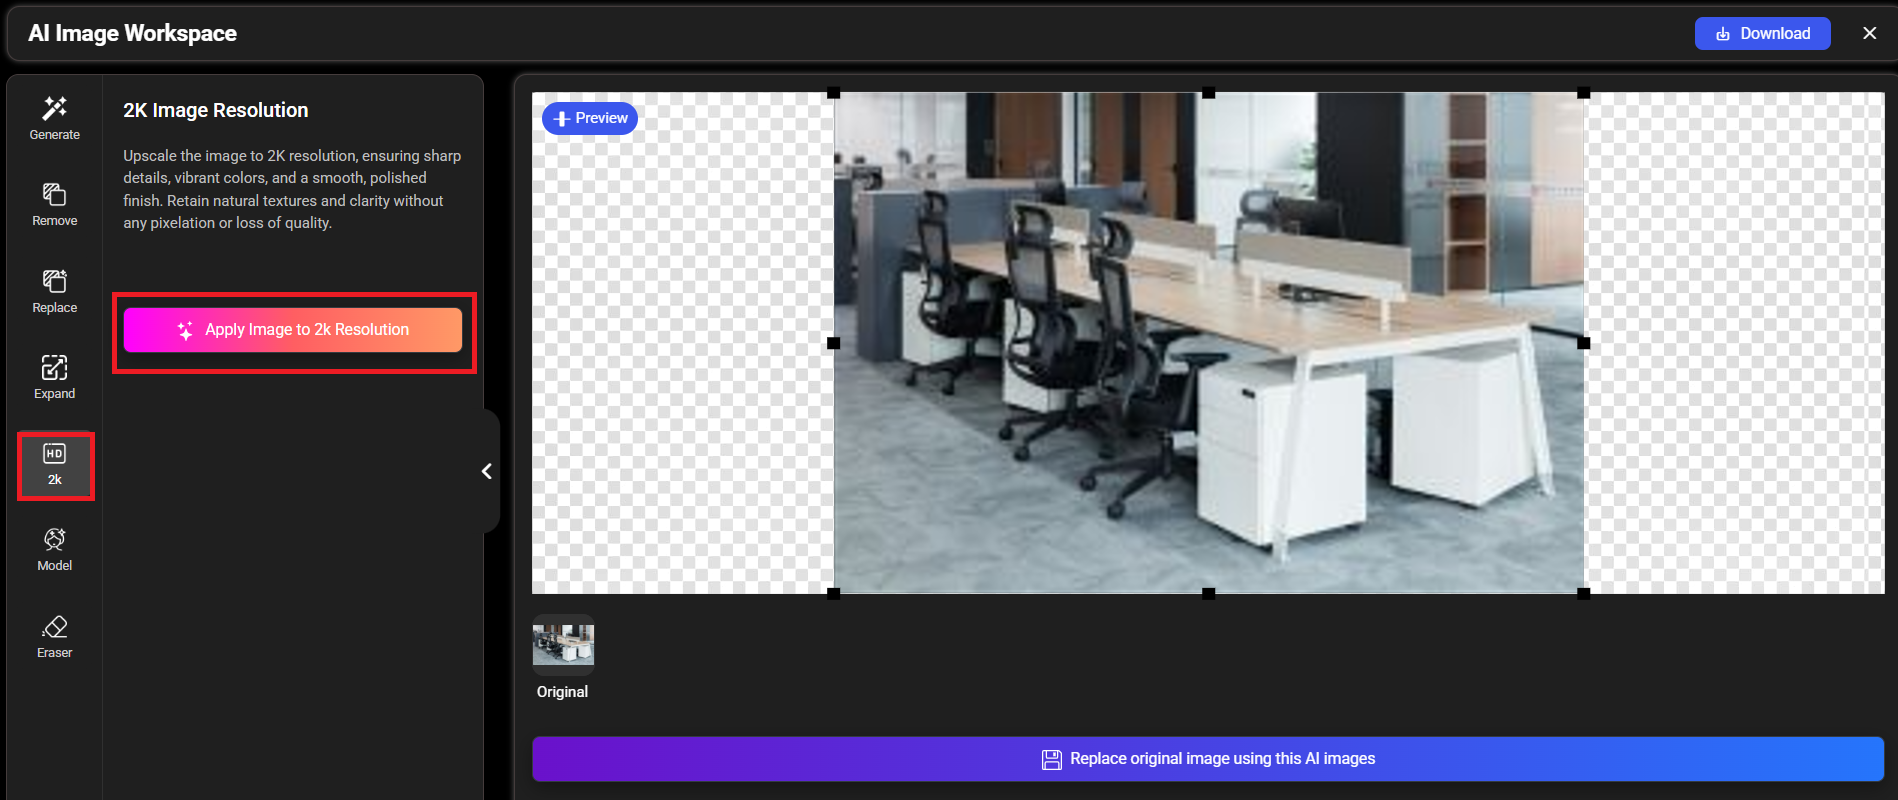
Step 4: Click "Apply Image to 2k resolution"
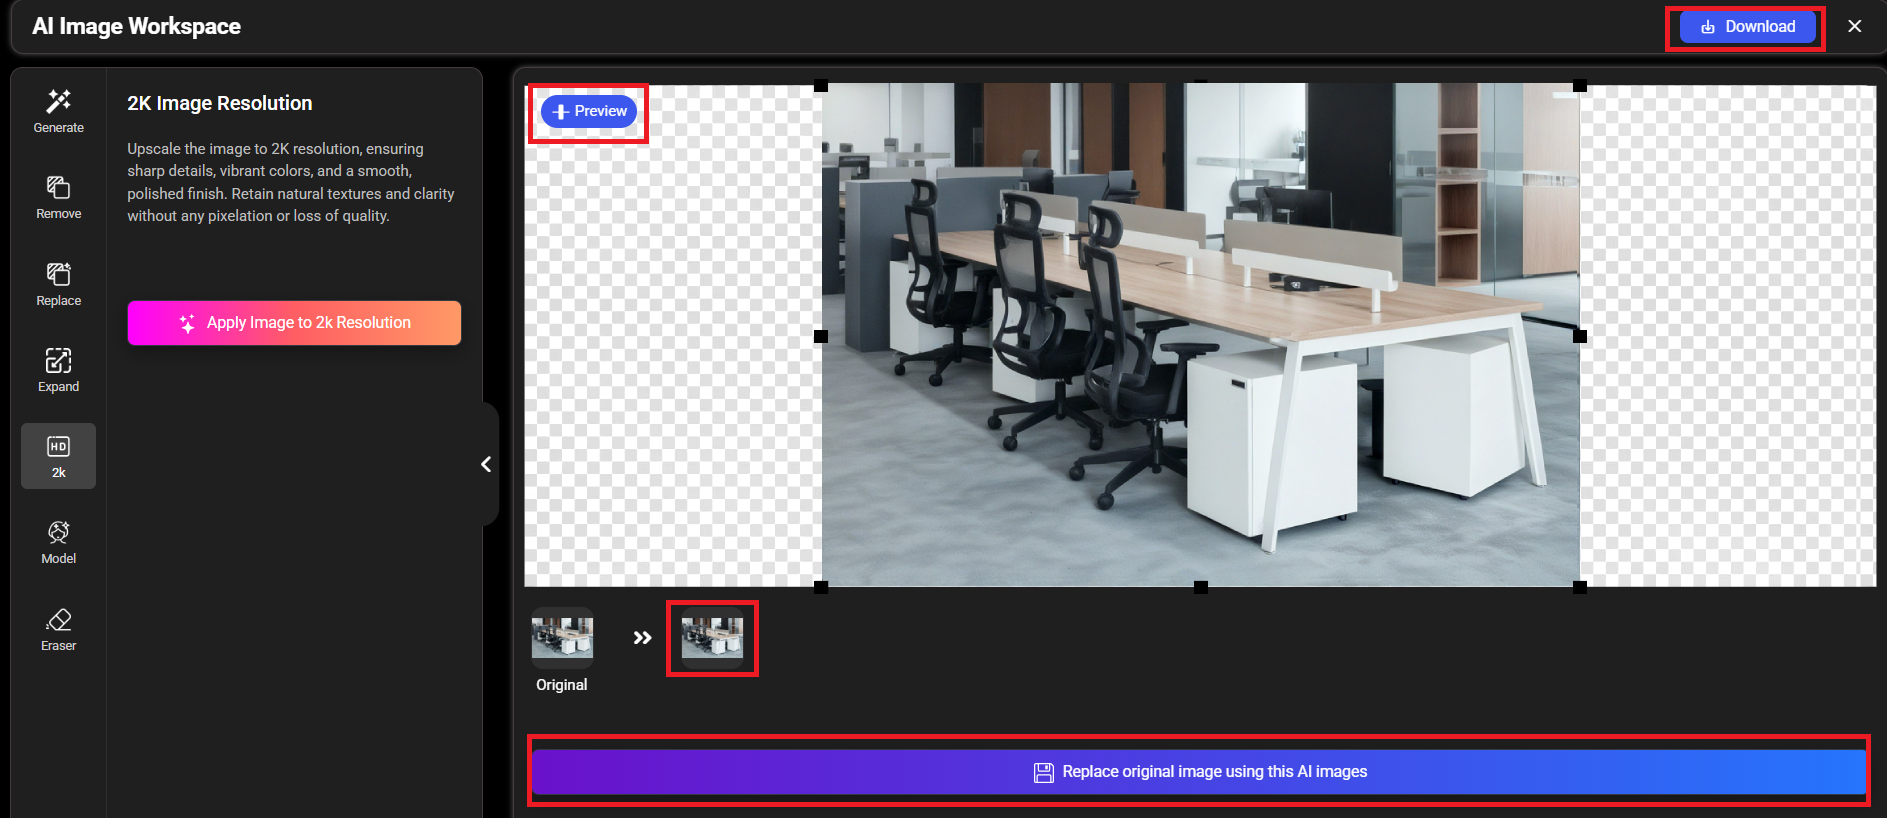
You can click the "Preview" button to view the before and after results.
If you're happy with the result, click 'Replace Original Image with AI Image' to automatically update the website picture.
You can also click 'Download Image' to save it.
Section 9: AI Model Modify
Things to note before you start
- The image must have at least one person.
- You must fill in the 'item to retain.'
- AI Model settings will be saved in the browser after use.
Step 2: You can enter your request in the field. Once done, click "Send".
If the results don’t meet your expectations, you can click 'Expert Mode' for advanced features.
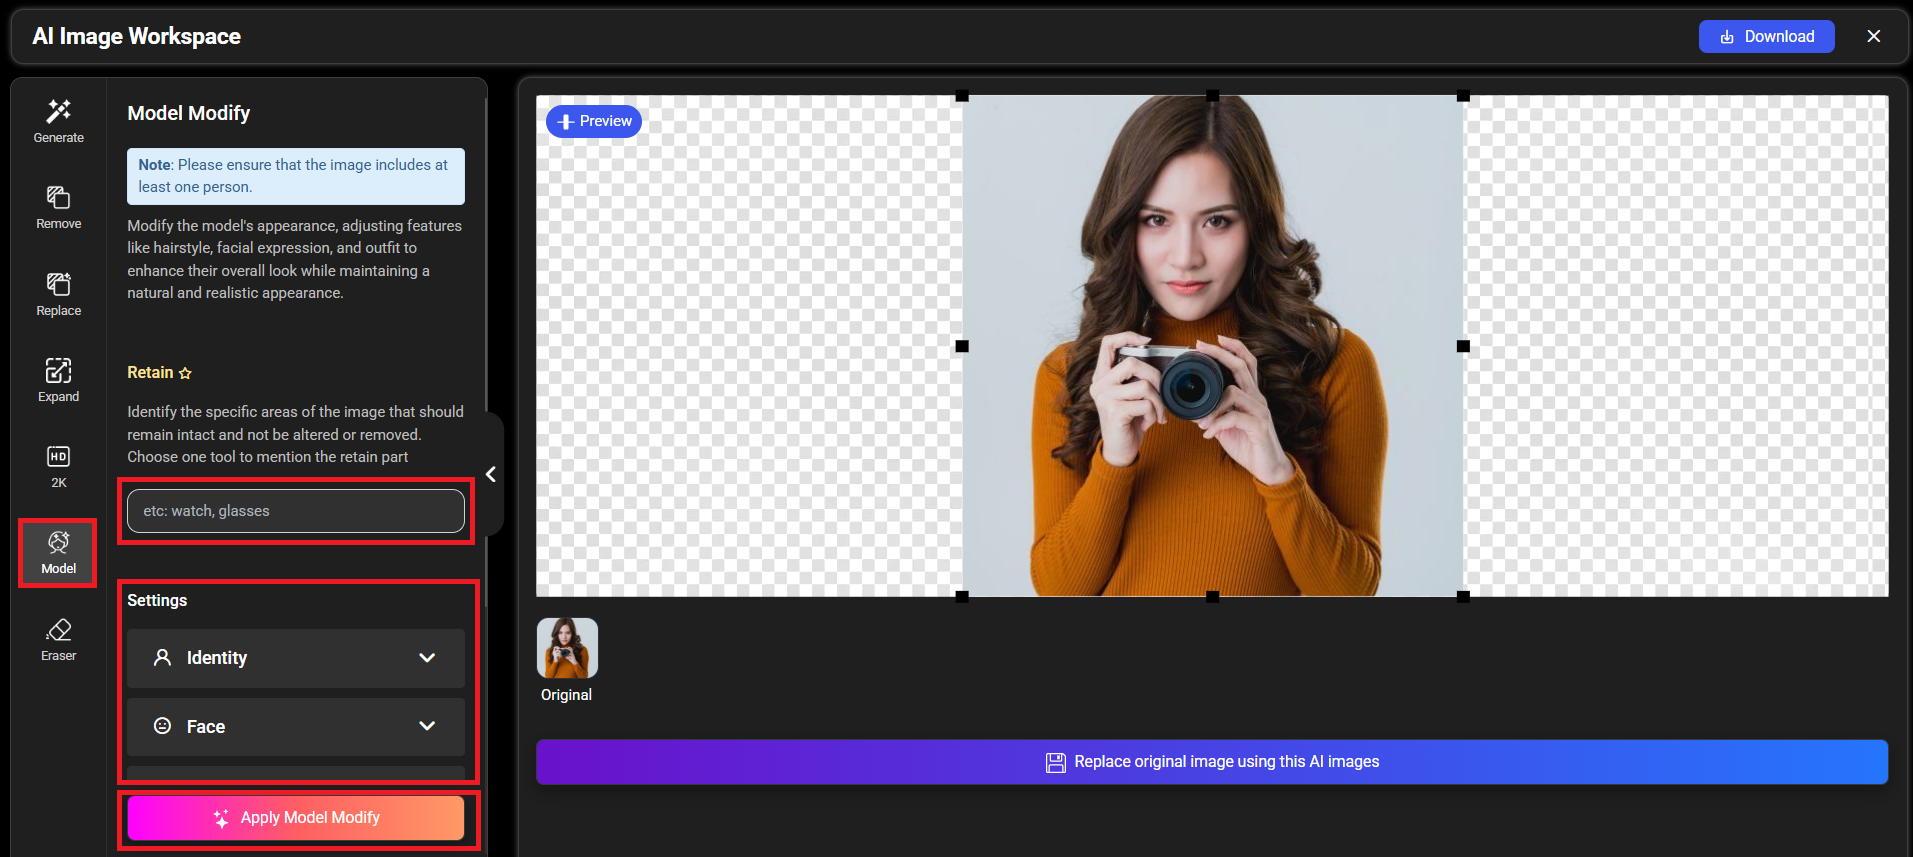
Step 4: Fill in the Retain column. Specific areas of the image should remain unchanged and do not need to be altered or removed.
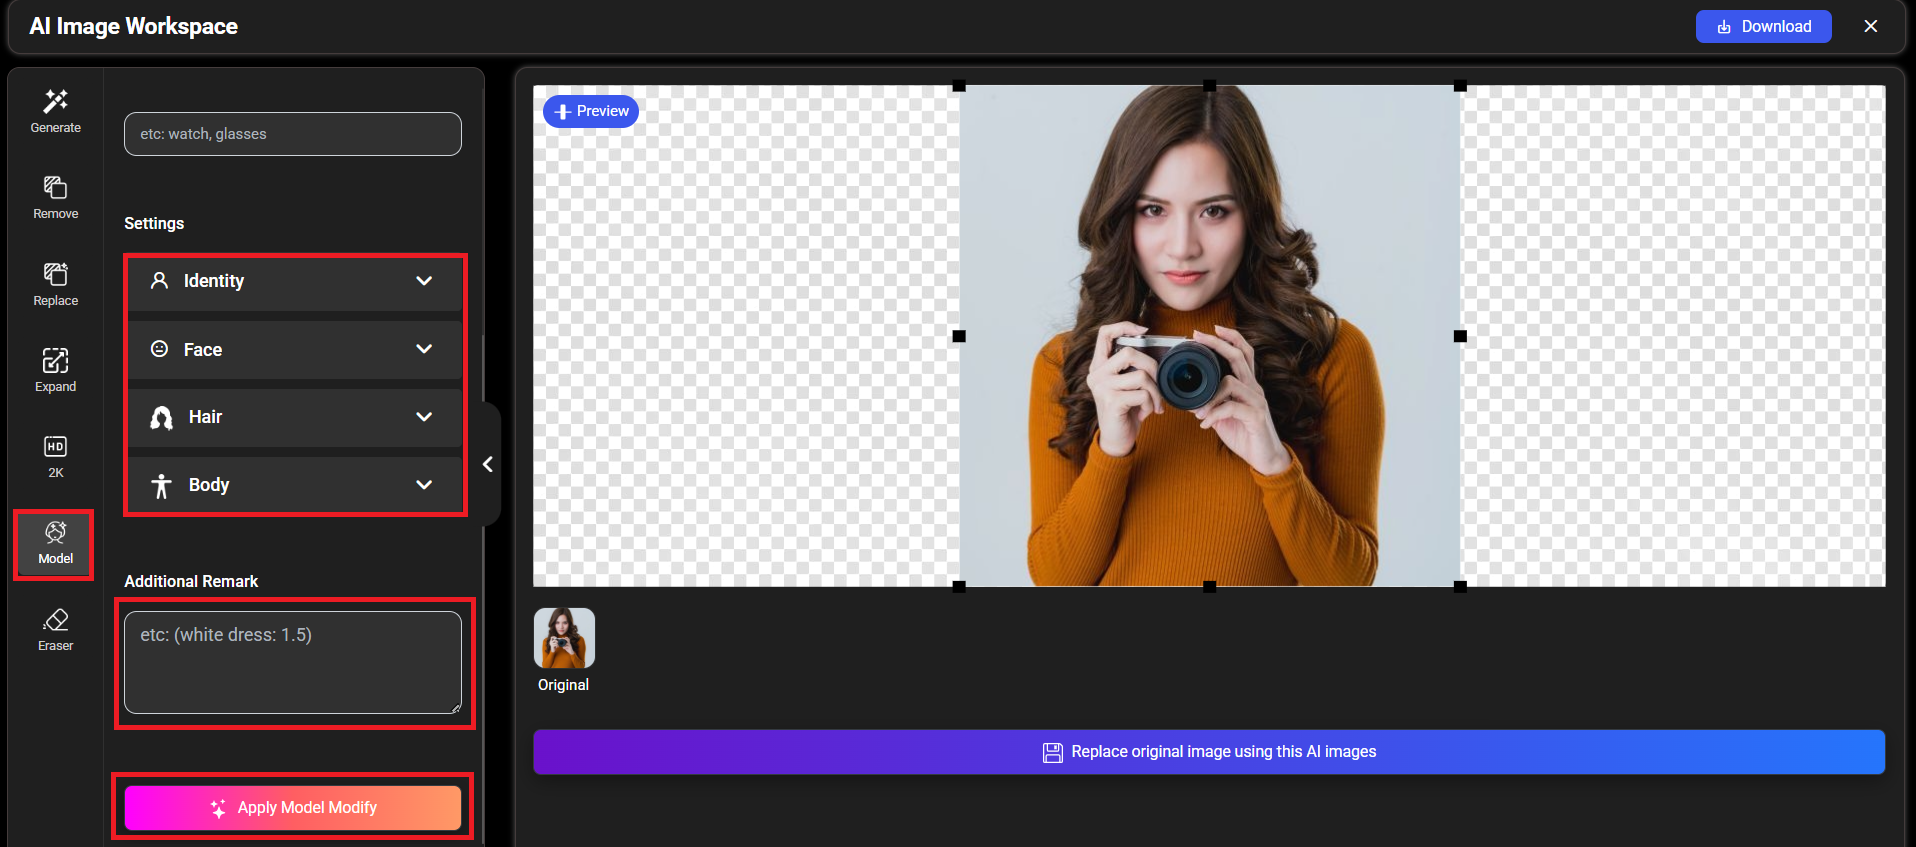
You can also leave an additional remark if needed.
Step 6: Once you've made your settings, click 'Apply Model Modify,' and the system will update the model to match your chosen settings.
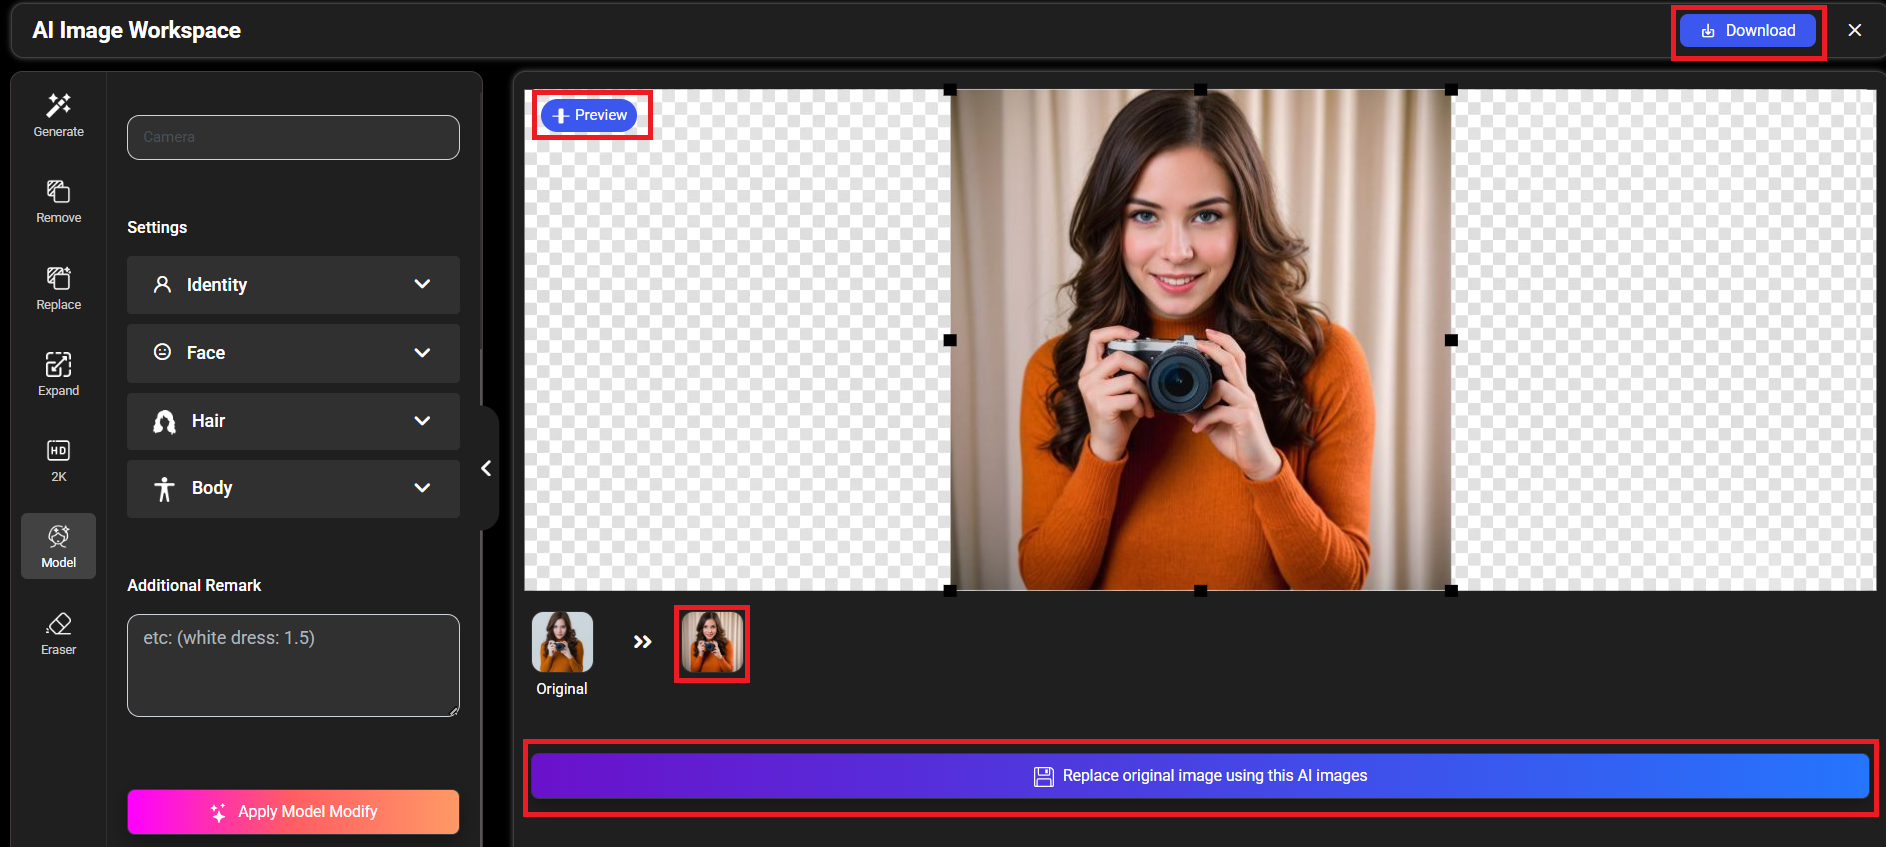
You can click the "Preview" button to view the before and after results.
If you're happy with the result, click 'Replace Original Image with AI Image' to automatically update the website picture.
You can also click 'Download Image' to save it.
Section 10: AI Remove Object
Step 2: You can enter your request in the field. Once done, click 'Send'."
If the results don’t meet your expectations, you can click 'Expert Mode' for advanced features.
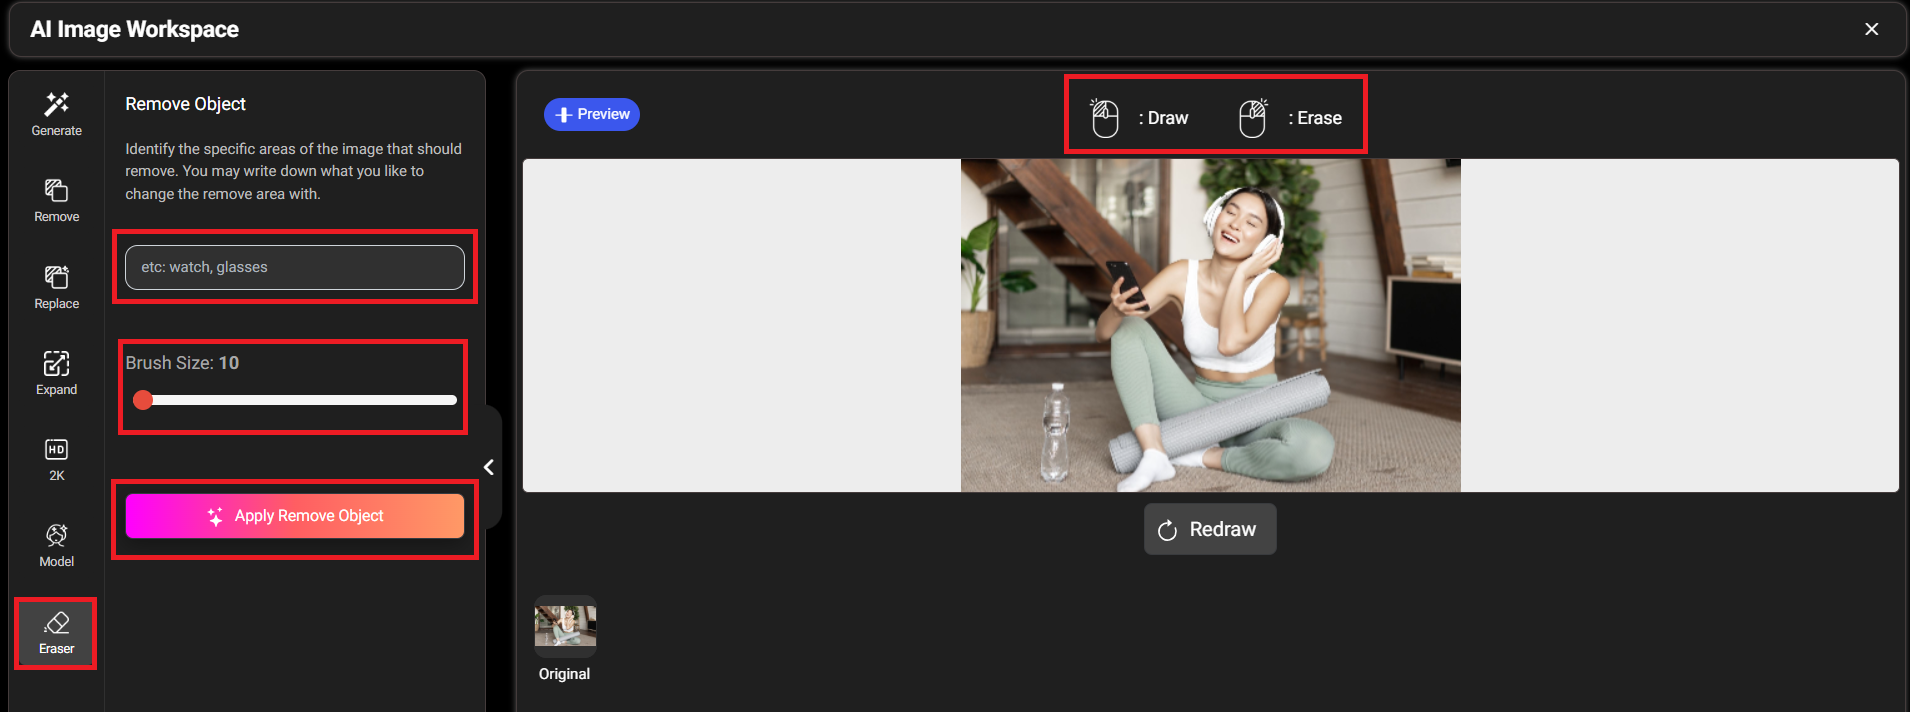
Step 3: Click “Eraser.”
Step 4: Left-click and drag your mouse to select the area you want to remove. If you select the wrong area, right-click and drag to remove the selection.
You can drag the red dot left or right to adjust the brush size (if needed).
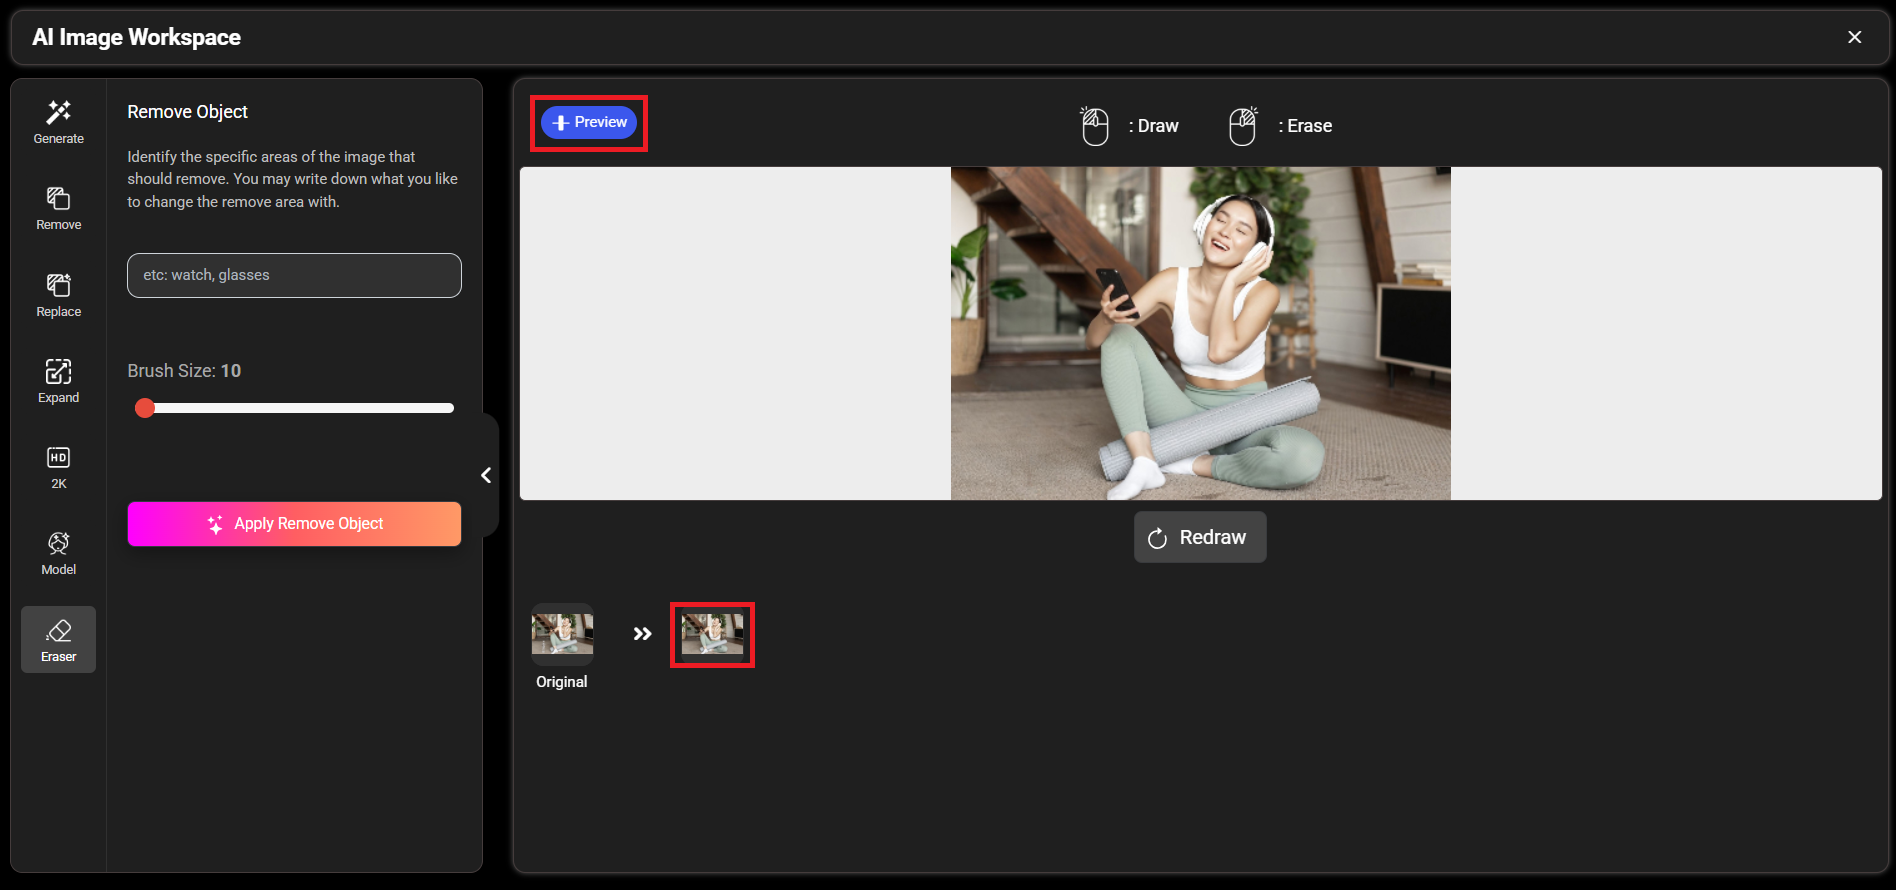
You can click the "Preview" button to view the before and after results.
